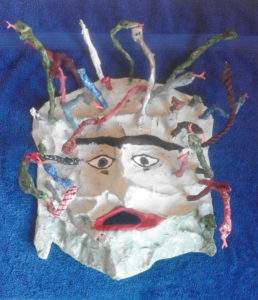
 For a costume party, Halloween costume, community theater performance, or just a rainy day project for the kids.
- Advantages: Cheap, fast, easy, light, not messy, can make almost any shape. Nontoxic materials, so suitable for children.
- Disadvantages: Crude, not good if fine detail required. Edges of tape show through, unless you use paper mache over it. Not very strong, not suitable if you need to travel with them. However, can be made stronger by adding paper mache, but this takes time for it to dry, and is messy.
Materials:
- Masking tape, 3/4 inch (19mm) to 1 inch (25mm). Make sure it’s the kind that’s very sticky. Some masking tape does not stick very well. Paper packaging tape works better if you can find it. However, I ordered some on Amazon and it turned out to be glossy, which is not good for this. Must be paintable.
- Aluminum foil, best is heavy duty baking foil but can use the thin kind too. In Europe the heavy duty is not easy to find.
- A little gauze.
- Elastic band for holding the mask to the head, ideally about 1 inch (25mm) wide. Available in craft or sewing stores. Can use ribbon if preferred.
- Sewing needle and thread.
- Paints – Tempura or Acrylic, and brushes: a fine one for detail and a broader one for wide coverage. I have also used latex paints, and even blended them with acrylic.
- Bits of old foam rubber or anything soft suitable to make face pads for inside mask. Crumpled brown paper will do.
- Anything extra you may want to add to the mask such as fake hair, ribbons, glitter, etc.
- White glue if you’re adding these extras.
- If doing paper mache, white flour or white glue and newspaper or brown paper. (Check internet for methods.)
Method:
Start with a square of foil much larger than the dimensions of the mask required, as making the features will shrink it. For a face sized mask, about 2 feet square (60cm) should work. If there’s extra you can fold it into the mask. If you have thick wide heavy duty foil, one or two thicknesses may be enough. With regular foil, fold it over back and forth and diagonally until you have a square of the required size, 5 or 6 layers thick.
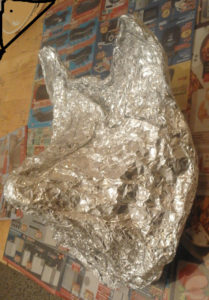
Work the foil into the shape you want, scrunching it as necessary. For extra features such as a long nose, ears, or beak, use a separate piece of foil and then tape it onto the mask. For the Medusa mask, I made each snake separately and taped them on.
Cut a mouth hole if required and small holes to see through. The eye holes don’t have to be where you will paint the eyes on the mask.
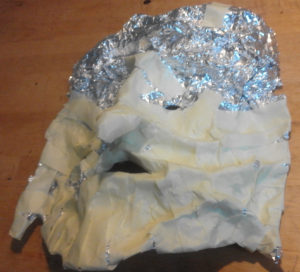
The mask will be quite easy to dent and bend at this point.
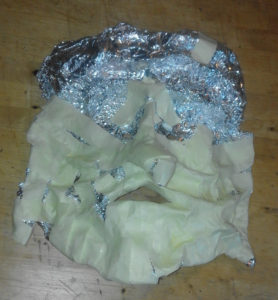
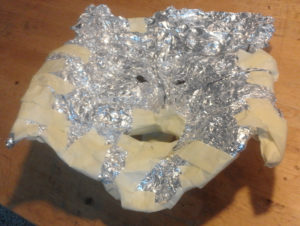
Keeping the shape as you want it, cover the whole mask, inside and out, with masking tape, smoothing it down well. For the mouth and eye holes, use small pieces that go from the inside to outside over the edges of the hole.
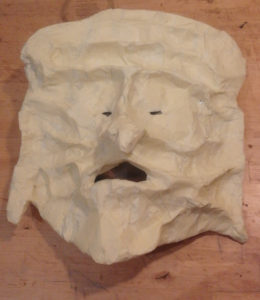
Cover all the foil, inside and out. Overlap the tape as much as necessary. You will end up with 2 or 3 layers, or even more, over all parts of the mask. The mask should be fairly rigid by now. If not, add more tape as necessary.
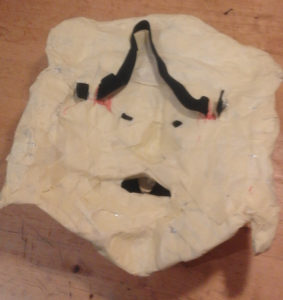
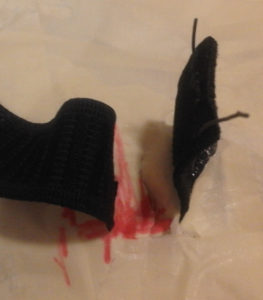
Add the head strap of elastic. Hold the mask against the face and make marks just forward of the top of the ears. Cut 2 vertical slits about 1/2 inch (12mm) apart. Push the end of the elastic through one slit from the back side of the mask, and back through the other. Leave enough of the end to sew onto the main part. Do the same with the other end of the elastic on the other side of the mask, pulling it tight enough to comfortably hold it on the head. Cut and sew the ends to the main part. Tape over the elastic on the front of the mask.
Try the mask on and if necessary add pads where the mask contacts the cheek bones to hold the mask away from the face, taping them on with more masking tape. You may also need a pad in the center of forehead. Gaffer’s or duct tape works well for this.
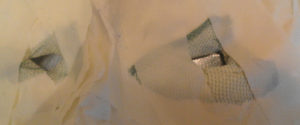
Tape gauze over the eye holes if they don’t correspond to where you want to paint eyes on the mask. You can then paint over the gauze and still see through it.
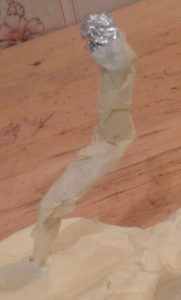
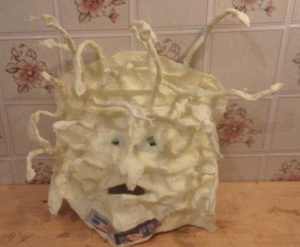
For the Medusa mask I made each snake out of rolled foil, flattened one end perpendicularly, and taped them onto the mask, then wrapped with thin strips of tape.
Add paper mache if you want to make the mask stronger and more durable.
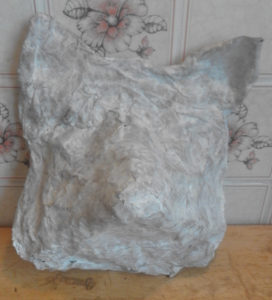
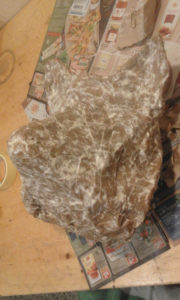
For the wolf mask I didn’t use tape at all, but covered it with paper mache with flour/water mixture. This also worked well, and gave a rough texture which I liked. For the eye area which had to have more detailed painting, I added some paper mache with white glue, to make it smoother. To hold the mask at the right angle, I used crumpled paper on the inside, held in place with gaffer’s tape (similar to duct tape), and covered the rest of the inside with the same tape.
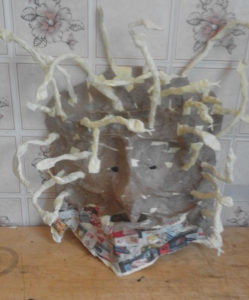
On the Medusa mask, the edges of the tape were peeling up, so I covered it with a layer of paper mache, using white glue diluted to half with water, and brown paper.

The tongues are doubled bits of tape, cut appropriately.
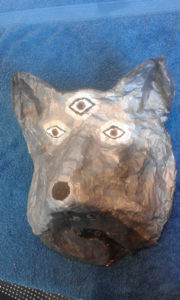
Paint and decorate the mask however you want.
Have fun!